Week 3: Research & Development, Production start
Development Blog Week 3 - Horror Level Design
Hello and welcome to Week 3 of my Horror Level Design development blog. This week I have been busy finishing up research and development and starting to create the first floor of the asylum.
Firstly I created a level pacing chart and decided upon the location of world events. The gameplay I have decided upon is inspired by Outlast and therefore there will be scripted jump scares, audio and VFX that the player will encounter. I will create this in a way so that it is immersive but also helps to give the level unique elements. I have decided to move into the production side of the project a week early as this will give me plenty of time to create my proposed project.
After ending the production stage I then proceeded to create a new project within Unreal Engine 4. I then installed a plugin to assist with easily creating the level design blockout using the plans I have previously made. This plugin allows easy scaling of geometry and has pre set shapes for windows, stairs and other types that speed up the process.
Once I hopped into the project I used the tools to create a baseplate that is used to contain the building. I created this project using the Unreal Engine 4 Third Person Perspective template which gives me quick and easy access to an already existing movement system, allowing me to focus on my level design.
I then changed the camera angle from the original third person template to a first person perspective as this is the perspective I chose to create to compliment the level design.

This is an example of the flashlight system working, in which a light will be shown in front of the player. This flashlight is built using the blueprints system in Unreal Engine 4.
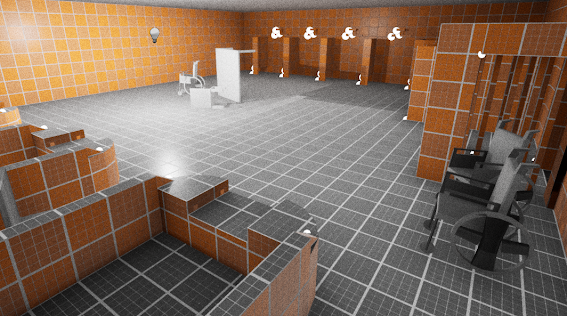
Once I had created the base plate and had gotten all of the basic systems and camera changes in place I then began work on the level blockout. I firstly created the entrance corridor and created the surrounding walls around it.
I was then happy with the overall layout and scale of the corridor and I decided to add windows into the side of each wall. This will eventually look out into the woods to give an immersive feel to the level.

After I had created the layout for the corridor I added a roof onto it to get a feel of what it would be like during dark locations.. I then started blocking out the reception area of the building. I added two different doorways which correspond to the plan I made previously.
Following on from this I then created both the security room and communal area as the way the rooms are designed allow them to be created simultaneously. I also decided that the staircase room did not feel correct. I made a minor change to the staircase room to add an extra doorway which would loop into the communal room. This also opened up the ground floor to a non linear path which I think helps with the pacing of the level and allows for more player freedom.
I then placed a roof over all rooms apart from the reception as this is going to be able to be viewed from the first floor. This allows a base for the first floor to be made in the near future.
Thank you for reading this weeks development blog, next week I will be creating the blockout for the first floor and deciding if the current plan is suitable.


Comments
Post a Comment