Posts

Week 10: Production

Image
  Development Blog Week 10 - Horror Level Design Welcome back to Week 10 of my Horror Level Design development blog. This week I have been creating blockout cinematics that are located on the exterior of the building. This gives an 'end' to the level. These cinematics are basic and would need to be improved upon further. However, as a blockout they work and show the proposed idea. Firstly this week I made minor changes to the car that the player will use to escape the asylum. I then placed a trigger box in which the player will walk into once exiting the building. Secondly, I placed cinematic cameras in each location that I will use for jump cuts in the cinematic. There are four of these that are used to add different camera angles to the cutscene. This is an example of what the cutscene currently looks like.  I then changed models of the main office key as well as removed the rotator component of the security key which was previously implemented for testing purposes. I placed...

Week 9: Production

Image
Development Blog Week 9 - Horror Level Design Welcome back to Week 9 of my Horror Level Design development blog. This week I have been making additions to the level, including multiple different basic mechanics and cinematics (to compliment the level design). I have been adding to this element as the main blockout of the level has already been implemented, along with item locations and world events. Although I have made additions to first floor. Firstly this week I have added more assets to 'clutter' the first floor, this helps to add more detail as well as a path for the player to follow. I then placed the assets in the office rooms, including desks, lockers and chairs. I placed assets in both the main office and the side office room located on the first floor. I then added a breakable wall in which the player is able to remove and crouch through. They can then access the key to the office room as the door to this room is blocked via a locker. This gets the player thinking and...

Week 8 : Production

Image
  Development Blog Week 8 - Horror Level Design Welcome back to Week 8 of my Horror Level Design development blog. This week I have been adding area gating to portions of the level to make it clear for where the player is supposed to go. I have done this by including items and small gameplay elements which help me to visualise how it will work in practice. This week I firstly replaced the last of the bathroom blockouts with assets. There is no longer and blockout pieces present within the level as all of them have been replaced with assets I have created. I also added a post processing volume around the the building and increased the grain, this gives more of a horror feeling to the level. After I had replaced the blockout pieces I moved back downstairs to work on the security room located off of the main corridor. I wanted to add more creative elements to the level in which the player will have to find to progress. Doing so, I created a moveable locker in which the player can inte...

Week 7: Production

Image
    Development Blog Week 7 - Horror Level Design   Welcome back to Week 7 of my Horror Level design development blog. This week I have been focusing on creating assets to replace the placeholder geometry that is currently present within the level. I firstly created a door asset in which I have placed within doorways in the level. I then created a blueprint containing the static mesh of the door. This blueprint runs on a timeline so that when the player walks near the door and interacts with it, the door will then open so that they are able to walk through into the room. I then started work on more models to replace the current blockout. I created a locker, wardrobe, three tables and various types of chairs. After this I then replaced the blockout assets with models I created, this helps to add detail to the level as well as allows me to create small gameplay elements around the models I have created. An example of this being the security door that the player can int...

Week 6: Production

Image
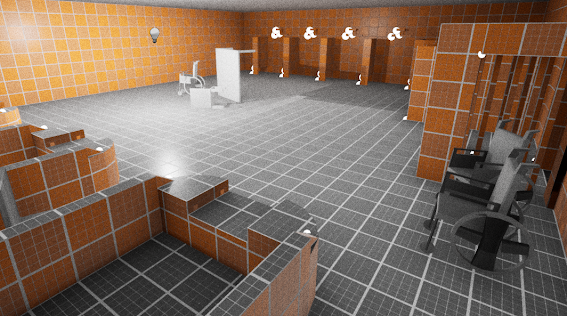
    Development Blog Week 6 - Horror Level Design Hello! Welcome back to Week 6 of my Horror Level Design development blog. This week I have been working on finishing the blockout of the entire asylum. Firstly I decided to get to work on creating the Men's bathroom. I have included toilets, baths and showers that are all located within this room. Using reference images I have attempted to recreate these rooms. I have also included jail bars that are used to section off these rooms, as they would only be available at certain times during the day. These would only be able to be accessed by the staff of the asylum. I then created the women's bathroom using the same layout as the mens. However, I have decided that this room was going to be left unlocked when it was 'abandoned' therefore it has been damaged by visitors and patients that were left behind here. After this I then decided to revisit the lower floor and add more detail to the corridor. I wanted to make it look li...

Week 5: Part 2 - Production

Image
  Development Blog Week 5 - Horror Level Design Hello and welcome to the second development blog of Week 5. In this post I will be showing off my progress of the blockout I have been working on. I have taken a lot of inspiration from the games I have conducted previous research on, this has assisted me in creating a well designed interior blockout. The first thing I did when getting back into Unreal Engine was to start work on blocking out the reception area. I have included a desk, monitors, shelves and lockers that help to add to the level. It also sections off this area and would allow the player to hide from enemies that would be present within the level. After this I decided that the room looked too bare. Using examples and reference images from ' Outlast ' it could be seen that there were multiple seating areas located within the reception. Therefore I decided that including these helped to add to the room and allow for overall better level design. I then decided to block...